Commercial Products
Open Source
Changing Cluster Topology in a Live Cluster
Introduction
Using the Terracotta Operations Center, a standalone enterprise-only console for operators, you can change the topology of a live cluster by reloading an edited Terracotta configuration file.
Note the following restrictions:
- Only the removal or addition of <server> blocks in the <servers> section of the Terracotta configuration file are allowed.
All servers and clients must load the same configuration file to avoid topology conflicts.
Servers that are part of the same server array but do not share the edited configuration file must have their configuration file edited and reloaded as shown below. Clients that do not load their configuration from the servers must have their configuration files edited to exactly match that of the servers.
Adding a New Server
To add a new server to a Terracotta cluster, follow these steps:
Add a new <server> block to the <servers> section in the Terracotta configuration file being used by the cluster. The new <server> block should contain the minimum information required to configure a new server. It should appear similar to the following, with your own values substituted:
<server host="myHost" name="server2" > <data>%(user.home)/terracotta/server2/server-data</data> <logs>%(user.home)/terracotta/server2/server-logs</logs> <statistics>%(user.home)/terracotta/server2/server-stats</statistics> <dso-port>9513</dso-port> </server>- If you are using mirror groups, be sure to add a <member> element to the appropriate group listing the new server.
Open the Terracotta Operations Center by running the following script:
UNIX/LINUX
${TERRACOTTA_HOME}/bin/ops-center.shMICROSOFT WINDOWS
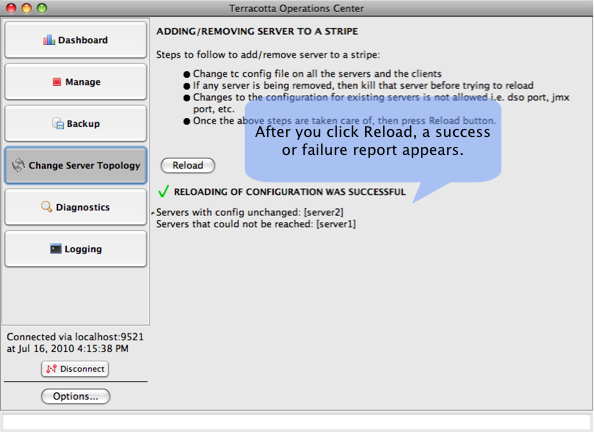
%TERRACOTTA_HOME%\bin\ops-center.bat- After connecting to the cluster with the Operations Center, open the Change Server Topology panel.
- Click Reload.
A message appears with the result of the reload operation.
- Start the new server.
Removing an Existing Server
To remove a server from a Terracotta cluster configuration, follow these steps:
- Shut down the server you want to remove from the cluster. If you shutting down an active server, first ensure that a backup server is online to enable failover.
- Delete the <server> block associated with the removed server from the <servers> section in the Terracotta configuration file being used by the cluster.
- If you are using mirror groups, be sure to remove the <member> element associated with the removed server.
Open the Terracotta Operations Center by running the following script:
UNIX/LINUX
${TERRACOTTA_HOME}/bin/ops-center.shMICROSOFT WINDOWS
%TERRACOTTA_HOME%\bin\ops-center.bat- After connecting to the cluster with the Operations Center, open the Change Server Topology panel.
- Click Reload. A message appears with the result of the reload operation.
Editing the Configuration of an Existing Server
If you edit the configuration of an existing server and attempt to reload its configuration, the reload operation will fail. However, you can successfully edit an existing server’s configuration by following these steps:
- Remove the server by following the steps in Removing an Existing Server. Instead of deleting the server’s <server> block, you can comment it out.
- Edit the server’s <server> block with the changed values.
- Add (or uncomment) the edited <server> block.
- If you are using mirror groups, be sure to add the <member> element associated with the server back to the appropriate mirror group.
- In the Operations Center’s Change Server Topology panel, click Reload. A message appears with the result of the reload operation.